So, it's no secret that I love shortbread. I used to think that the only way to get good shortbread was to drop down some serious cheddar on Walker's Shortbread Fingers. Then when I got back into cooking, one of the first things I tried was making shortbread. Surprisingly enough, it's pretty darn easy. It's basically flour, sugar and butter. It's called bread, by the way, since the British taxed cookies and cakes when they occupied Scotland and this was a way around that. Anyway, I've been making shortbread pretty regularly since, most of the time Millionaire's Shortbread. What I haven't been able to do is make a good Gluten Free shortbread. The version I have in my previous blog post was OK, it was kind of heavy though. I finally found a version that is light and crispy. Unfortunately I haven't been able to try it out with butter, since our son who can't have gluten can't have milk either, so if you try this it will probably be much better with butter.
You'll need:
1/2 Cup cornstarch
1/2 cup icing sugar
1 cup rice flour
1 teaspoon vanilla
3/4 cup butter or margarine (175g)
Preheat your oven to 300F (150C).
Add all the dry ingredients and mix well.
Make sure your shortening is cold and cut it into cubes and add it to the dry mix.
Then get mixing.Start with a fork but you'll need to get to kneading it with your hands.
I had a bit of help.
It should form a slightly sticky ball. Put it onto a sheet of plastic wrap and roll it into a log. Refrigerate for about 20 minutes. This is actually when you should turn on the oven.
When it's set and the shortening has hardened cut it into rounds and place them on some parchment on a cookie sheet.
Now you can get fancy. I put chopped almonds on some and vanilla sugar on the rest.
20 minutes in the oven...
They kind of melted into each other. I'll work on that, but they're super crisp and very tasty. So, get baking!
Showing posts with label No Gluten. Show all posts
Monday, April 4, 2011
Thursday, March 31, 2011
No need to Waffle about these things. Go right ahead and eat em.
Yes, it's been a while since I did some food blogging, but things have been pretty busy in the news and political blogging world. I've managed to get on average two posts up at Big Journalism a week as well as one up on News Real Blog. I have a few more real Jewish food recipes waiting to get written up, but I thought I'd digress and toss in a quick Gluten Free breakfast treat for all you folks who are unable to partake in wheat and associated grains. So, get your irons ready and get your waffle on!
You'll Need:
You'll Need:
1 1/4 cups rice flour (either brown or white)
1/4 cup corn flour
1/2 cup potato starch
1/4 cup tapioca flour
2 teaspoons baking powder
1 teaspoon salt
1/4 cup oil
2 eggs (separated)
1 1/2 cups buttermilk (I used soy buttermilk which is 1 3/8 cups soy milk + 2 tbsps vinegar)
2 tablespoons sugar
1/4 cup corn flour
1/2 cup potato starch
1/4 cup tapioca flour
2 teaspoons baking powder
1 teaspoon salt
1/4 cup oil
2 eggs (separated)
1 1/2 cups buttermilk (I used soy buttermilk which is 1 3/8 cups soy milk + 2 tbsps vinegar)
2 tablespoons sugar
Start heating your waffle iron and put the oven on at 200F (95C)
Mix up your flours, baking powder and salt. I had some help for this step.
If you are able to use milk, measure it out. If you want to do it with soy milk then you'll need to curdle it with vinegar. Mix the soy milk and vinegar and stir. Let it sit for 5 or so minutes.
Next up we'll do the eggs. Separate the whites and yolks. The yolks go in with the milk, the whites should be kept on the side.
Add the oil to the milk and egg yolk and mix it up. Then add to the dry ingredients.
Now for the real trick to light crispy waffle. Take your egg whites and beat them to a soft peak.
Add the sugar one tablespoon at a time while beating it. When it's done we're going to fold it into the rest of the batter one scoop at a time. Make sure to get those creases sharp!The resulting batter should be, for lack of a better word, fluffy. Think Hello Kitty. And now into the waffle iron. Every waffle iron is different, so if you're not used to your give yourself a mulligan the first time out. It should come off light and crispy.
In any event, when it's ready put it into the warm oven directly on the rack. This will crisp it up a bit more and keep them warm so you can serve all your waffles as a big batch. Add Syrup or honey to taste. Sit around with friends and family and let them adore you.
Enjoy!
Joo Food
In any event, when it's ready put it into the warm oven directly on the rack. This will crisp it up a bit more and keep them warm so you can serve all your waffles as a big batch. Add Syrup or honey to taste. Sit around with friends and family and let them adore you.
Enjoy!
Joo Food
Wednesday, January 19, 2011
Lack of Posts. And rice.
Sorry I haven't posted in the last week. A family member passed and my wife has gone off to New York to be with her parents, so I'm home with all the little ones. If anyone tells you that being a homemaker is easy, non-stressful work, kick them and call them a bald faced liar or a complete fool. Then kick them again.
The little ones are asleep, well, in bed, so I've had a bit of time in the kitchen and I'm trying to adapt the Millionaire's Shortbread recipe to be Gluten and Dairy Free. My original attempt at gluten free shortbread was mildly successful. I used dark buckwheat flour which has a very strong taste. I didn't care for it, but the two littlest, who are on the Glutenless diet, didn't seem to mind and ate it up. I've been making cornbread muffins this week also. I was planning to post a recipe, but my wife took the camera with her, so hopefully next week.
On a completely unrelated note, I mentioned that one of the best things I ever picked up on a business trip was my Fuzzy logic Rice Cooker. I was under the impression that they were only available off in the inscrutable East. I was wrong! You can get them on line. If you're a regular rice eater I can't recommend one of these enough. They aren't cheap. The smaller ones, 5 1/2 cups run around $150, but that's enough for 20 people easily. Guys, get these for your wives, sisters, mothers or even yourself. You won't regret it.
The little ones are asleep, well, in bed, so I've had a bit of time in the kitchen and I'm trying to adapt the Millionaire's Shortbread recipe to be Gluten and Dairy Free. My original attempt at gluten free shortbread was mildly successful. I used dark buckwheat flour which has a very strong taste. I didn't care for it, but the two littlest, who are on the Glutenless diet, didn't seem to mind and ate it up. I've been making cornbread muffins this week also. I was planning to post a recipe, but my wife took the camera with her, so hopefully next week.
On a completely unrelated note, I mentioned that one of the best things I ever picked up on a business trip was my Fuzzy logic Rice Cooker. I was under the impression that they were only available off in the inscrutable East. I was wrong! You can get them on line. If you're a regular rice eater I can't recommend one of these enough. They aren't cheap. The smaller ones, 5 1/2 cups run around $150, but that's enough for 20 people easily. Guys, get these for your wives, sisters, mothers or even yourself. You won't regret it.
Tuesday, January 11, 2011
The bell rings, the dog drools. The Pavlova response.
I'm a big fan of cooking shows, especially competitive ones. Back in the day it was Iron Chef out of Japan and Ready, Steady, Cook from the UK. The genre has certainly expanded in the last few years with the advent of Top Chef in the US and MasterChef in the UK. Last year MasterChef opened a franchise in Australia as well. The format is very different than the UK version with major tryouts across the country for amateur chefs, the best of whom went on to compete in the season. For some of us it was a first time exposure to some Australian classics. One of those is Pavlova. What is Pavlova you ask? Well, it's a GIANT meringue, with a crisp outside and marshmallowy middle. It's traditionally served with whipped cream and berries. Well, about 6 months ago I gave it a go and it came out pretty well. The recipe calls for egg whites only, so I figured I'd make a custard to go along with it and settled on Creme Anglaise. Needless to say, big hit. Then one of my twins asked if she could make it the following week. And the week after. And the week after. So, what started out as a one time goof off in the kitchen for a special treat has turned into an almost weekly indulgence. This is a bit of a time consuming endeavor, so unless you have lots of time, or cheap teenage laborers you might want to push it off for a special occasion.
Ingredients: Pavlova
6 Egg whites
1 cup sugar powder
1 tsp vinegar
1/2 tbsp cornstarch
Creme Anglaise
6 egg yolks
2 cups light cream (we use vanilla soy milk, for that parve feeling)
2 tsp vanilla extract
1/3 cup sugar
Preheat your oven to 250F(130C).
You'll have to separate your eggs. This really isn't hard, but may take a bit of practice, do each egg over a bowl and only when you're sure there's no yolk in the white and only then put the white into a mixing bowl.
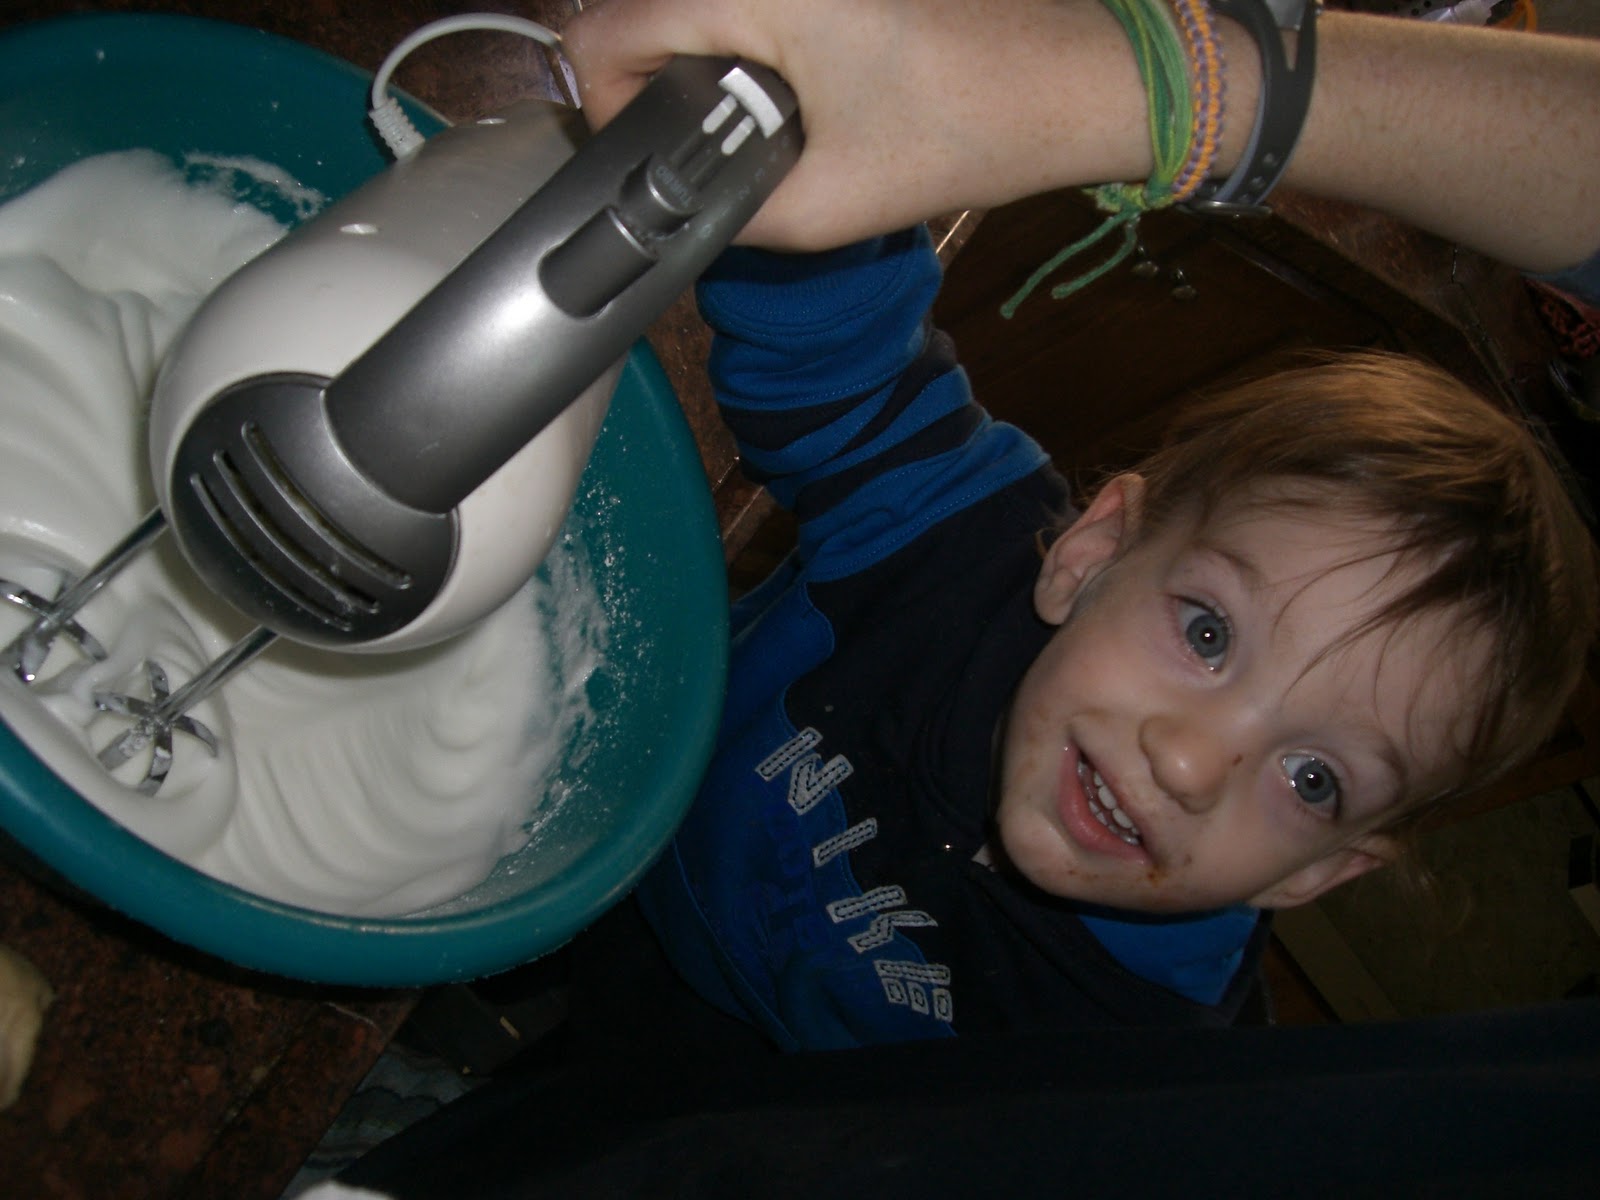
Get out your handy dandy electric mixer and get to whipping. You'll want to get it to the soft peak stage, where you lift the mixer out and it leaves a bit peak that holds for a few seconds and then melts just a bit.
At this point you want to start adding the sugar a big spoon at a time. Keep beating while you're adding the sugar.
We had some extra help. Keep beating until you get very stiff peaks, that is to say when you lift the mixer the meringue holds the peak and doesn't move.
Then sprinkle the vinegar and cornstarch on top and fold in with a spatula. Then lay a piece of baking parchment on a baking tray and dump the meringue out onto it.
With a spoon or spatula shape it into a big round flat topped mountain.
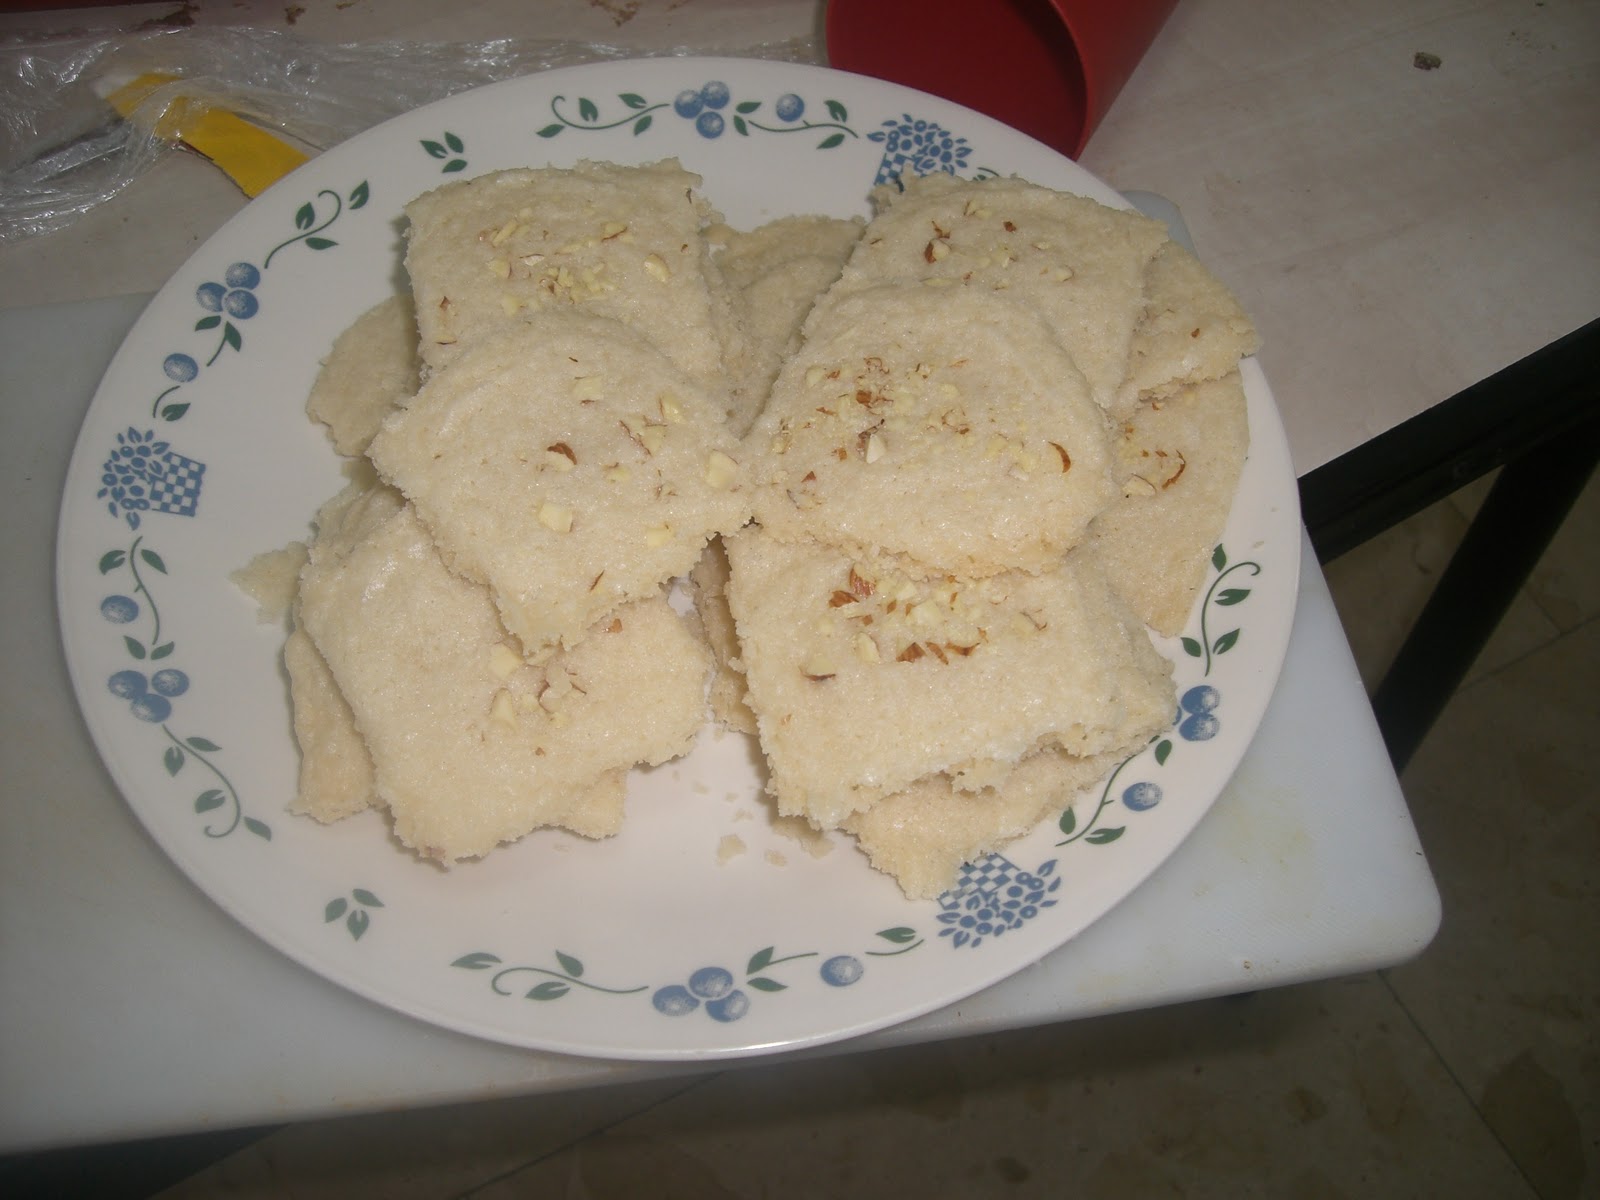
Bang that puppy into the oven for about an hour and quarter. It should be crisp and firm on the outside. It'll start to crack as it cools down and you'll start seeing cracks form on the outside, this means it's still soft on the inside. So, well done you!
While the Pavlova is baking away you can get to the Creme Anglaise.
We kind of cheat along the way, but that's fine, that's the hallmark of the good amateur home chef.
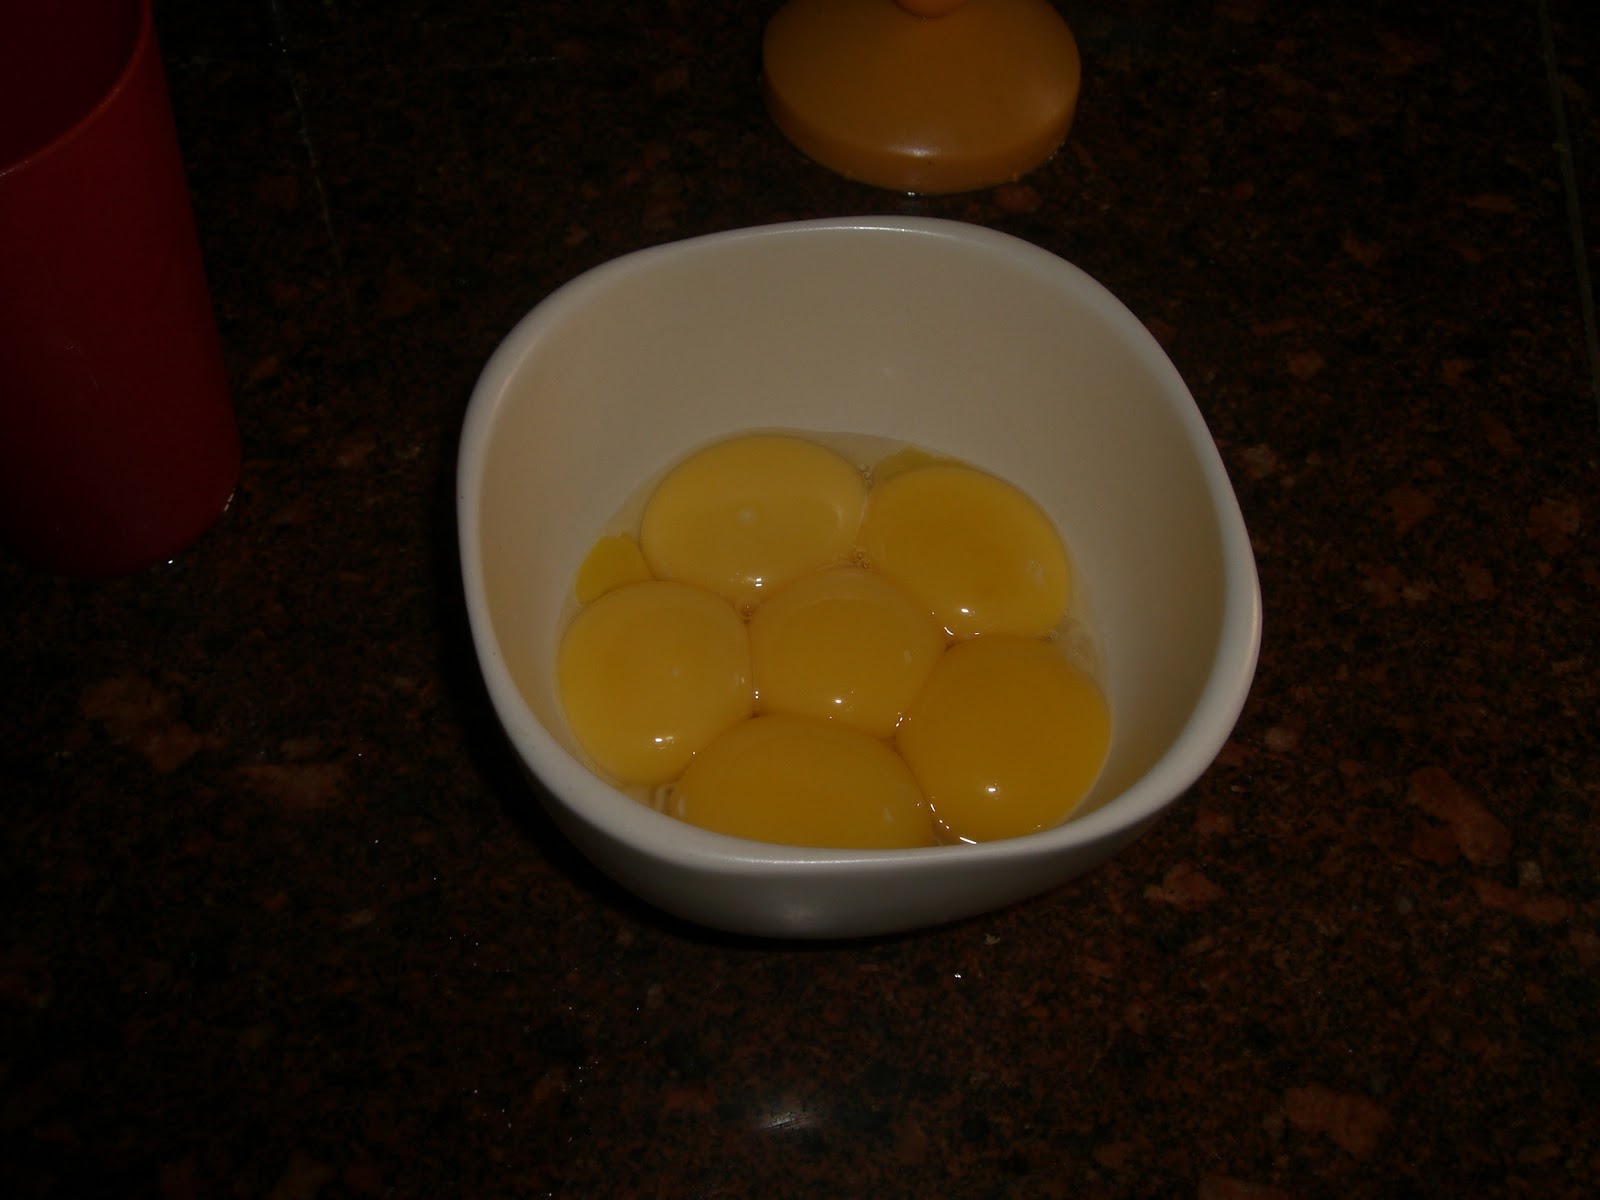
So, you have your egg yolks from the Pavlova.
Mix in the sugar, slowly, you don't want to beat it. Those are good yolks, they don't deserve it.
Separately heat up the cream and vanilla in a saucepan just to the boiling point. Remove from heat and slowly whisk it bit by bit into the egg and sugar mixture. Then pour the mixture back into the saucepan.
Gently heat the mixture and keep stirring. You don't want it to get too hot or you'll end up with with sweet vanilla scrambled eggs. You also need to keep stirring. If you have a Robostir you'll be good. The creme should be just steaming, but not boiling. You'll keep this up while the custard thickens. It's ready when you can dip a wooden spoon in it, hold it up and run your finger through the custard and the line remains.
Then it's done. Now is the part where we cheat. Unless you're a great natural cook and your custard comes out creamy smooth you'll probably have a few lumps. So, into the food processor. Give it a good blitz, this will also aerate it a bit adding a bit more body and make it smooth and creamy.
It'll still be warm, so you should put it in a bowl and into the fridge to cool down. Well, that's the hard part. A dollop or two of whipped cream on top of the Pavlova and sprinkle with fresh berries or kiwi slices and serve. Cut into slices like you would a cake, the inside should be soft and fluffy, dress with a few spoons of the Creme Anglaise. Enjoy with close friends and family.
Ingredients: Pavlova
6 Egg whites
1 cup sugar powder
1 tsp vinegar
1/2 tbsp cornstarch
Creme Anglaise
6 egg yolks
2 cups light cream (we use vanilla soy milk, for that parve feeling)
2 tsp vanilla extract
1/3 cup sugar
Preheat your oven to 250F(130C).
You'll have to separate your eggs. This really isn't hard, but may take a bit of practice, do each egg over a bowl and only when you're sure there's no yolk in the white and only then put the white into a mixing bowl.
Get out your handy dandy electric mixer and get to whipping. You'll want to get it to the soft peak stage, where you lift the mixer out and it leaves a bit peak that holds for a few seconds and then melts just a bit.
At this point you want to start adding the sugar a big spoon at a time. Keep beating while you're adding the sugar.
We had some extra help. Keep beating until you get very stiff peaks, that is to say when you lift the mixer the meringue holds the peak and doesn't move.
Then sprinkle the vinegar and cornstarch on top and fold in with a spatula. Then lay a piece of baking parchment on a baking tray and dump the meringue out onto it.
With a spoon or spatula shape it into a big round flat topped mountain.
Bang that puppy into the oven for about an hour and quarter. It should be crisp and firm on the outside. It'll start to crack as it cools down and you'll start seeing cracks form on the outside, this means it's still soft on the inside. So, well done you!
While the Pavlova is baking away you can get to the Creme Anglaise.
We kind of cheat along the way, but that's fine, that's the hallmark of the good amateur home chef.
So, you have your egg yolks from the Pavlova.
Mix in the sugar, slowly, you don't want to beat it. Those are good yolks, they don't deserve it.
Separately heat up the cream and vanilla in a saucepan just to the boiling point. Remove from heat and slowly whisk it bit by bit into the egg and sugar mixture. Then pour the mixture back into the saucepan.
Gently heat the mixture and keep stirring. You don't want it to get too hot or you'll end up with with sweet vanilla scrambled eggs. You also need to keep stirring. If you have a Robostir you'll be good. The creme should be just steaming, but not boiling. You'll keep this up while the custard thickens. It's ready when you can dip a wooden spoon in it, hold it up and run your finger through the custard and the line remains.
Then it's done. Now is the part where we cheat. Unless you're a great natural cook and your custard comes out creamy smooth you'll probably have a few lumps. So, into the food processor. Give it a good blitz, this will also aerate it a bit adding a bit more body and make it smooth and creamy.
It'll still be warm, so you should put it in a bowl and into the fridge to cool down. Well, that's the hard part. A dollop or two of whipped cream on top of the Pavlova and sprinkle with fresh berries or kiwi slices and serve. Cut into slices like you would a cake, the inside should be soft and fluffy, dress with a few spoons of the Creme Anglaise. Enjoy with close friends and family.
Saturday, January 1, 2011
Kettle Corn for your movie viewing pleasure
First of all, this isn't my recipe. I got it from Sara from Average Betty. It's one of the best cooking blogs out there with tasty recipes that anyone can make from her excellent directions. Go check it out and visit often. Here's her Kettle Popcorn recipe, make sure you watch the video too.
1/2 Cup popping corn
1/4 Cup sugar
2 Tbsp. Vanilla Sugar
1/3 cup vegetable oil
Salt
It's actually pretty easy. If you make pop corn in a pot, you can make this. For some added value I'll put in my extra special tips for storing popcorn kernels.
Put the oil in the pot and start heating it up.
Add the corn and sugar. I like to add in some vanilla sugar which gives the whole house a wonderful smell and a nice subtle flavor to the popcorn.
Mix it all up over high heat until it pops.
It takes about 10 minutes by us to get it all popped.
You should be shaking and moving the pot the whole time so it all pops evenly and the sugar melts and spreads over everything. When there's more than a second or two between pops you know it's all done. Dump it out into a bowl and salt to taste. Hide from family members and enjoy your cheesy sci-fi flicks.
Tips for making sure your popcorn kernels stay poppy.
1. Store in an air tight container.
2. Put a bit of water in with the kernels to keep them moist.
3. Keep it in the refrigerator
See, the whole reason popcorn pops, as we learned in 3rd grade is that there is a bit of water in them that boils and then all the starch expands. These three easy steps make sure that it doesn't dry out and when it comes time to cook them, they pop quickly and evenly.
Happy noshing!
1/2 Cup popping corn
1/4 Cup sugar
2 Tbsp. Vanilla Sugar
1/3 cup vegetable oil
Salt
It's actually pretty easy. If you make pop corn in a pot, you can make this. For some added value I'll put in my extra special tips for storing popcorn kernels.
Put the oil in the pot and start heating it up.
Add the corn and sugar. I like to add in some vanilla sugar which gives the whole house a wonderful smell and a nice subtle flavor to the popcorn.
Mix it all up over high heat until it pops.
It takes about 10 minutes by us to get it all popped.
You should be shaking and moving the pot the whole time so it all pops evenly and the sugar melts and spreads over everything. When there's more than a second or two between pops you know it's all done. Dump it out into a bowl and salt to taste. Hide from family members and enjoy your cheesy sci-fi flicks.
Tips for making sure your popcorn kernels stay poppy.
1. Store in an air tight container.
2. Put a bit of water in with the kernels to keep them moist.
3. Keep it in the refrigerator
See, the whole reason popcorn pops, as we learned in 3rd grade is that there is a bit of water in them that boils and then all the starch expands. These three easy steps make sure that it doesn't dry out and when it comes time to cook them, they pop quickly and evenly.
Happy noshing!
Tuesday, December 21, 2010
Bake Me Two Times, Baby.
For the record, this recipe has nothing to do with bands that do Doors cover shows or going down to the shore in a Camero that my parents drove up from the Bahamas in. Also, no Milkmen involved.
This is a new recipe I tried out last night for Twice Baked Potatoes. It came out pretty good. Another recipe that is easy to tweak according to taste. There's only one sort of difficult step.
Ingredients:
8 medium potatoes
1/2 cup sour cream
1/4 cup butter
3 tbsp. salt
1/2 cup cheese, grated, sliced, whatever.
Other spices, cooked vegetables.
Bake the potatoes, about 45 minutes at 375F(190C), check them, it may take closer to 55 minutes.
When they're done, cut them in half and scrape out the middle, leaving the skins intact. That's the hard part, since the skins are easy to rip. Set them aside and put all the insides into a bowl.
Mix the butter, sour cream and salt into the potato guts and mush it up (technical term used in all the finest culinary academies).
It should be creamy but there should still be some good sized potato chunks in there. This is the point where you can get creative. Chives, sauteed onions, diced mushrooms, garlic, mix it up!
Fill the scooped out shells with the crushed up potato mash. Top with spice mix of choice then cover with cheese. 10 minutes on 425F(220F) and you're good to go.
Also, this is something you can make ahead of time. So good for the kids on a cold Winter's day!
This one is gluten free as well.
This is a new recipe I tried out last night for Twice Baked Potatoes. It came out pretty good. Another recipe that is easy to tweak according to taste. There's only one sort of difficult step.
Ingredients:
8 medium potatoes
1/2 cup sour cream
1/4 cup butter
3 tbsp. salt
1/2 cup cheese, grated, sliced, whatever.
Other spices, cooked vegetables.
Bake the potatoes, about 45 minutes at 375F(190C), check them, it may take closer to 55 minutes.
When they're done, cut them in half and scrape out the middle, leaving the skins intact. That's the hard part, since the skins are easy to rip. Set them aside and put all the insides into a bowl.
Mix the butter, sour cream and salt into the potato guts and mush it up (technical term used in all the finest culinary academies).
It should be creamy but there should still be some good sized potato chunks in there. This is the point where you can get creative. Chives, sauteed onions, diced mushrooms, garlic, mix it up!
Fill the scooped out shells with the crushed up potato mash. Top with spice mix of choice then cover with cheese. 10 minutes on 425F(220F) and you're good to go.
Also, this is something you can make ahead of time. So good for the kids on a cold Winter's day!
This one is gluten free as well.
Subscribe to:
Posts (Atom)