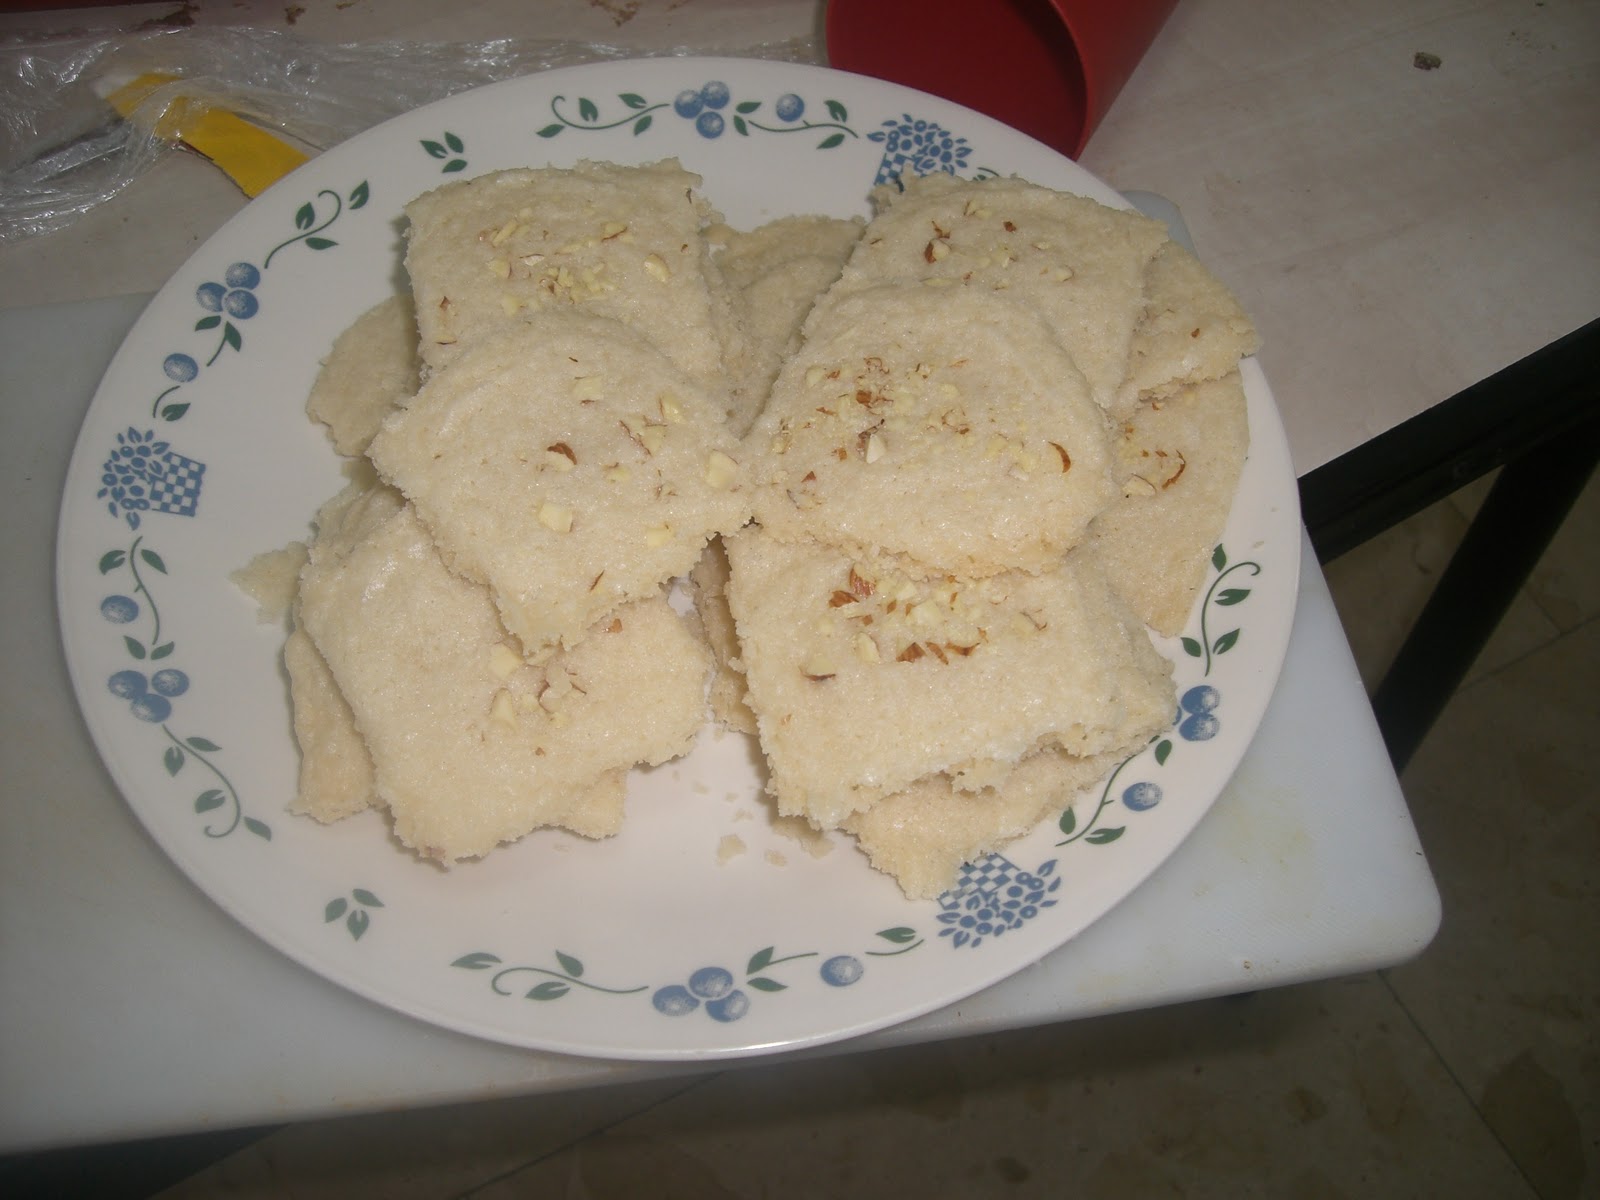
Well, it's been a heck of a long time since I last blogged and even longer since I last blogged food. I hope to change that. Meanwhile I'm on a new diet based on Tim Ferris's book the 4-Hour Body. If you don't know Ferris and his books, you're missing out. He is all about hacking everything, from lifestyles to bodies to sleeping patterns. In any event, the short summary of the diet is that there are no carbohydrates, milk or fruit allowed during the week, but all the protein and fat your can stomach. I've been on it for close to 3 weeks and I'm losing an average of more than 3 lbs. a week. The only issue is coming up with what to eat. So, I hope to bring a few easy, and tasty, recipes for you to add to your repertoire. Unlike most of my other recipes these are generally for one or two people and not scaled up to my usual family sized, so keep that in mind if you're going to be cooking for a crowd. I'll also be doing whole meals, not just single dishes. As a side note all of the recipes will be sugar, dairy and gluten free, so if you're into that stuff you'll rock these recipes.
The first meal is Burgers stuffed with onion jam, grilled tomatoes and cabbage and almond slaw.
You'll need:
8 oz. ground beef
1 medium onion
1 clove garlic
1/2 cup stock (or water if stock isn't available)
1/4 cup red wine
Kosher Salt
Pepper
1 tsp garlic powder
1 tsp red chili flakes (optional)
1 medium tomato
1/2 cup shredded red cabbage
1/8 cup almond slivers
1 Tbsp. apple cider vinegar
Toss the shredded cabbage and vinegar in a bowl and set aside.
Dice the onion and drop it in a frying pan with a bit of oil and start sauteing them, chop the garlic and toss that in too. When they become translucent add half the stock and keep cooking them until all the liquid is gone, then add the rest of it. Cook until it's gone then add the wine, letting that reduce down. This should all take about half an hour. The truth is, it would probably be good to quadruple the amount of onions and double the liquid measures, setting 3/4 of it aside for later use. What you'll have left is a dark onion-y sludge with the consistency close to marmalade or jam.
Next, add a teaspoon of salt, pepper and garlic powder to your ground beef, mixing it through. Then you'll want to separate it into two equal sized portion and pat them down to form two, well, patties. Make them about 1/4 of an inch thick because we're going to fold them up on themselves.
Place a heaping spoon of the onion jam in the middle of each patty and bring up the sides to engulf the filing, mush closed. Don't worry if it doesn't close all the way, close is good enough.
Now comes cooking time. I have a grill pan, but you can do all this in a regular frying pan without a problem. If you're using a flat bottomed pan add a touch of oil or non-stick spray when the pan is hot and then add the burgers. Make sure you put the top side down, that is the side you attempted to close. This will seal it so the onions don't all leak out. I'd say cook 5 minutes on each side, twice. For a total of 20 minutes in the pan.
Right after the first flip, cut your tomato into three even rounds, so two slices, one on either side of the stem. Add them to the pan and sprinkle with salt and pepper. When you flip your burgers, flip the tomatoes.
Almost done! Put the burgers on your plate, then the sprinkle the extra onions over both. Get your cabbage slaw that was set aside and mix in the almond slivers. Add that to the plate. Pour yourself tall glass of ice water and maybe add a lemon twist. Eat!
Showing posts with label Gluten Free. Show all posts
Saturday, November 19, 2011
Wednesday, August 10, 2011
Live Blogging Thai Cooking with my girls
This is mostly a place holder until about 7 PM Israel time. (Noon Eastern)
We're making Thai food.
On the menu Ho Mok Pla, Sate with crispy rice noodles and Khao niao mamuang!
7:15 PM Israel Time
We're just getting things together!
Here's the rice for the Khao niao mamnaug, it's been soaking for the last few hours.
7:45 PM Here are our rice noodles! They're going to be the crispy base for the sate.
The girls are helping, clean the fish and prepare the mixture for the Ho Mok Pla.
8:00 The fish is being finely diced. It will get mixed with eggs, coconut milk, green curry paste, red chili, and some lime zest as well as a squeeze of lime. That's being done by Aderet (a.k.a. #2of8)
8:25 The sate sauce is put mixed up and Emunah (a.k.a. #3of8) is cutting up the chicken to be marinated. The sweetened coconut milk is done for the dessert. I'm heating the oil for crisping the noodles.
8:45 The first test batch of Ho Mok Pla (not a Klingon name) is out! A smashing success for those who like their food extra spicy. Which is everyone except my wife. Really tasty with a nice hot finish.
We're making Thai food.
On the menu Ho Mok Pla, Sate with crispy rice noodles and Khao niao mamuang!
7:15 PM Israel Time
We're just getting things together!
Here's the rice for the Khao niao mamnaug, it's been soaking for the last few hours.
7:45 PM Here are our rice noodles! They're going to be the crispy base for the sate.
The girls are helping, clean the fish and prepare the mixture for the Ho Mok Pla.
8:00 The fish is being finely diced. It will get mixed with eggs, coconut milk, green curry paste, red chili, and some lime zest as well as a squeeze of lime. That's being done by Aderet (a.k.a. #2of8)
8:25 The sate sauce is put mixed up and Emunah (a.k.a. #3of8) is cutting up the chicken to be marinated. The sweetened coconut milk is done for the dessert. I'm heating the oil for crisping the noodles.
8:45 The first test batch of Ho Mok Pla (not a Klingon name) is out! A smashing success for those who like their food extra spicy. Which is everyone except my wife. Really tasty with a nice hot finish.
9:45 Sorry for no updates. Blogspot isn't behaving.
Okay, it's the next morning. Blogger kept crashing Firefox, I even tried Chrome and it wasn't working.
Here are the pictures from the rest of the evening.
Here's the sate grilling away. The chicken ended up beautifully moist and the peanut sauce had a nice tang with out undertones of coconut. The peanut flavor was also wonderfully subtle. I forgot to scatter crushed peanuts on top which would have given it a nice textural crunch though.
All in all it was pretty successful. I need to work on the crispy fried rice noodles, they were a bit too oily. I should make them in advance next time so they have more time drain. Also, we were using the Wok to steam the fish custard, so I used a flat bottomed sauce pan, so I don't know if that was an issue.
The dessert was pretty delicious. Khao niao mamuang was wonderful, the rice wasn't overly sweet and the coconut came through, the mango really matched up with, complimenting the flavor. I think the only thing I changed would have been to chop up some mint and fold it through the rice just before serving.
Here's how we made the Ho Mok Pla:
8 oz of a delicate white fish fillet. We used St. Peter's fish, but sole or flounder should be good.
1/2 cup coconut milk
2 eggs
2 Tbsp green Thai curry (good especially if you can't find Kaffir lime leaves)
1 Lime, both the zest and the juice
10 Basil leaves. (If you can get Thai basil, that's best. You can also use Coriander/Cilantro or regular fresh basil leaves)
Something to steam it all in. We used baking parchment, but it should be done in banana leaves. You can also use shot glasses or ramekins.
Make sure there is no skin or bones left on the fish, then dice it finely. In a separate bowl mix all the other ingredients together. I'd say taste it first. If you like it hotter dice up a couple red chilies and add them in. These will also add nice red flecks which will look nice. Mix the egg stuff into the fish. If you're going to do it in banana leaves or parchment, take a circle, put a large dollop in the middle, put a basil leaf or sprig of cilantro on top, fold over and staple it shut. Or use toothpicks. Or pins. The other option is to fill shot glasses or ramekins.
You'll need a steamer at this point. If you don't have a one then you can improvise, a wok with a wire trivet worked for us. Fill with water to an inch or two bellow the bottom of what ever you're using and cover, bring to a fast boil. Put the packages or cups on the rack and let steam for 5 minutes.
If you've done it in cups then just let them cool down, garnish with a fresh bit of basil/cilantro and serve with a spoon. If you've gone the package route then open up and plate it. Be careful, these things have a powerful kick. I ate a half dozen they were that good. Wonderful lime flavor, soft custardy texture, a hint of coconut and basil all tied together with the heat. We plated it with a few slices of home made pickled cucumber to add some acidity to the mix and help cool the heat.
Enjoy!
Monday, May 30, 2011
Smoke. Lemon. Chicken. Tasty.
We had a big family gathering this Shabbos. My In-Laws have been her for the last week and a half so my Sister-In-Law and family joined us for the weekend. We had, baby included, 21 people and one dog in attendance. I'm happy that I had most of the week off and was able to do some serious cooking. I normally do some chicken roasting for Shabbos but I wanted to try something a bit different to wow the crowd. The Lemon burgers were such a hit that I thought I'd do another simple lemon recipe. This one needs a grill though. You can probably do it with a gas grill as well, but I have a charcoal grill so that's what I used.
You'll need:
A grill
Charcoal (not a lot, I used about half of what I'd normally use when grilling, since you want a lower heat)
Wood chips (I took from our apple tree, but hickory or oak would be fine)
Fresh rosemary
2 whole chickens (or one or more depending on how many people you want to feed and size of grill)
3 large lemons ( 1 and 1/2 per chicken)
Handful of Kosher salt
Salt the outside and inside of the chickens and slice two of the lemons thinly and one lemon cut in half. The lemon that you've cut in half squeeze into the cavity of the chicken and then stuff it inside.
Now, out to the grill. Lay out your coals and light them, when the flames have gone down and the coals are glowing take a piece of foil and lay it over the top.
Place your wood chips and rosemary on the foil.
Replace the grill and cover it with lemon slices.
Place the chickens on the lemons. I did one breast down and one back down. I think the breast down came out a bit better. So, that's what I'll suggest. Cover the chickens with the remaining lemon slices.
Put the cover on the grill and come back an hour later to make sure that it's not too hot and things aren't burning. Otherwise cover it back up for another 2 hours. Check again, then give it another hour until the coals are cool.
Let the chicken rest for 15 minutes before serving. Take the lemon out of the cavity, it should be soft enough to spread like butter. After you've carved the birds, squeeze the lemon out over it for some extra zing. Hand out chunks of rind on the plates as well. Revel in the adoration of your Mother-in-Law. Smoking the chicken at a low heat keeps it very moist and you get a nice smokey flavor to counter the acidic zing of the lemon.
You'll need:
A grill
Charcoal (not a lot, I used about half of what I'd normally use when grilling, since you want a lower heat)
Wood chips (I took from our apple tree, but hickory or oak would be fine)
Fresh rosemary
2 whole chickens (or one or more depending on how many people you want to feed and size of grill)
3 large lemons ( 1 and 1/2 per chicken)
Handful of Kosher salt
Salt the outside and inside of the chickens and slice two of the lemons thinly and one lemon cut in half. The lemon that you've cut in half squeeze into the cavity of the chicken and then stuff it inside.
Now, out to the grill. Lay out your coals and light them, when the flames have gone down and the coals are glowing take a piece of foil and lay it over the top.
Place your wood chips and rosemary on the foil.
Replace the grill and cover it with lemon slices.
Place the chickens on the lemons. I did one breast down and one back down. I think the breast down came out a bit better. So, that's what I'll suggest. Cover the chickens with the remaining lemon slices.
Put the cover on the grill and come back an hour later to make sure that it's not too hot and things aren't burning. Otherwise cover it back up for another 2 hours. Check again, then give it another hour until the coals are cool.
Let the chicken rest for 15 minutes before serving. Take the lemon out of the cavity, it should be soft enough to spread like butter. After you've carved the birds, squeeze the lemon out over it for some extra zing. Hand out chunks of rind on the plates as well. Revel in the adoration of your Mother-in-Law. Smoking the chicken at a low heat keeps it very moist and you get a nice smokey flavor to counter the acidic zing of the lemon.
Wednesday, May 11, 2011
The Now Famous Lemon Burgers
So, yesterday was Israeli Independence Day. We, as is the national tradition, grilled. I actually had a great day in the kitchen. It started out with waffles and strawberry syrup from scratch, followed by an interview on the Stage Right show. I then made pie crust dough for the eventual apple pie as well as mixed up a batch of pizza crust dough for foccacia.
We were having a bunch of guests over in the afternoon so I needed to start getting the meat situation worked out. That brings us to the main reason for this blog entry. A while back I had seen a cooking show where someone stuffed lemons with cheese and veggies, so I figured I'd make a bit of a change and make Lemon Burgers. I don't have pictures of the process since I was kind of busy all day. It's pretty simple though.
Ingredients:
1 lb. ground beef (1/2 kg)
1/2 cup barbecue sauce
3 cloves of garlic thinly diced
1 tbsp coarse ground pepper
3-4 large lemons
Mix the ground beef, barbecue sauce, garlic and pepper together. Slice the lemons into inch thick rounds and cut out the centers. Make sure you leave a small amount of pulp attached to the inside of the rind. Take the pulp from one of the lemons, cut out chunks so you don't get the white connective fibers and mix that in with the beef. Then stuff the lemon rinds with the ground beef.
I like to put it in the refrigerator for an hour or two so the meat sets. Then it's off to the gril.
Meanwhile, it was foccacia time! Rolled out, a bit of olive oil, coarse salt and fresh rosemary, then into the oven. When they were finished, I made a compound oil with some more olive oil and fire roasted garlic, which I spread on the bottom of the foccacia before putting it on the coals.
Anyway, back to the burgers...
Lay them out on the grill, spread evenly.
Depending how you like yours done, 6 minutes, then flipped, then again and once more.
That should get them to a nice medium. More importantly, the whole neighborhood should smell like lemons and the rinds should be nice and sweet. Eat the whole thing as is. Totally gluten free and exploding with flavor. Though you can put it on a bun if you want, go light on the condiments.
Enjoy!
We were having a bunch of guests over in the afternoon so I needed to start getting the meat situation worked out. That brings us to the main reason for this blog entry. A while back I had seen a cooking show where someone stuffed lemons with cheese and veggies, so I figured I'd make a bit of a change and make Lemon Burgers. I don't have pictures of the process since I was kind of busy all day. It's pretty simple though.
Ingredients:
1 lb. ground beef (1/2 kg)
1/2 cup barbecue sauce
3 cloves of garlic thinly diced
1 tbsp coarse ground pepper
3-4 large lemons
Mix the ground beef, barbecue sauce, garlic and pepper together. Slice the lemons into inch thick rounds and cut out the centers. Make sure you leave a small amount of pulp attached to the inside of the rind. Take the pulp from one of the lemons, cut out chunks so you don't get the white connective fibers and mix that in with the beef. Then stuff the lemon rinds with the ground beef.
I like to put it in the refrigerator for an hour or two so the meat sets. Then it's off to the gril.
Meanwhile, it was foccacia time! Rolled out, a bit of olive oil, coarse salt and fresh rosemary, then into the oven. When they were finished, I made a compound oil with some more olive oil and fire roasted garlic, which I spread on the bottom of the foccacia before putting it on the coals.
Anyway, back to the burgers...
Lay them out on the grill, spread evenly.
Depending how you like yours done, 6 minutes, then flipped, then again and once more.
That should get them to a nice medium. More importantly, the whole neighborhood should smell like lemons and the rinds should be nice and sweet. Eat the whole thing as is. Totally gluten free and exploding with flavor. Though you can put it on a bun if you want, go light on the condiments.
Enjoy!
Monday, April 4, 2011
It's not too long until you'll get your Shortbread. Even if you can't have Gluten.
So, it's no secret that I love shortbread. I used to think that the only way to get good shortbread was to drop down some serious cheddar on Walker's Shortbread Fingers. Then when I got back into cooking, one of the first things I tried was making shortbread. Surprisingly enough, it's pretty darn easy. It's basically flour, sugar and butter. It's called bread, by the way, since the British taxed cookies and cakes when they occupied Scotland and this was a way around that. Anyway, I've been making shortbread pretty regularly since, most of the time Millionaire's Shortbread. What I haven't been able to do is make a good Gluten Free shortbread. The version I have in my previous blog post was OK, it was kind of heavy though. I finally found a version that is light and crispy. Unfortunately I haven't been able to try it out with butter, since our son who can't have gluten can't have milk either, so if you try this it will probably be much better with butter.
You'll need:
1/2 Cup cornstarch
1/2 cup icing sugar
1 cup rice flour
1 teaspoon vanilla
3/4 cup butter or margarine (175g)
Preheat your oven to 300F (150C).
Add all the dry ingredients and mix well.
Make sure your shortening is cold and cut it into cubes and add it to the dry mix.
Then get mixing.Start with a fork but you'll need to get to kneading it with your hands.
I had a bit of help.
It should form a slightly sticky ball. Put it onto a sheet of plastic wrap and roll it into a log. Refrigerate for about 20 minutes. This is actually when you should turn on the oven.
When it's set and the shortening has hardened cut it into rounds and place them on some parchment on a cookie sheet.
Now you can get fancy. I put chopped almonds on some and vanilla sugar on the rest.
20 minutes in the oven...
They kind of melted into each other. I'll work on that, but they're super crisp and very tasty. So, get baking!
You'll need:
1/2 Cup cornstarch
1/2 cup icing sugar
1 cup rice flour
1 teaspoon vanilla
3/4 cup butter or margarine (175g)
Preheat your oven to 300F (150C).
Add all the dry ingredients and mix well.
Make sure your shortening is cold and cut it into cubes and add it to the dry mix.
Then get mixing.Start with a fork but you'll need to get to kneading it with your hands.
I had a bit of help.
It should form a slightly sticky ball. Put it onto a sheet of plastic wrap and roll it into a log. Refrigerate for about 20 minutes. This is actually when you should turn on the oven.
When it's set and the shortening has hardened cut it into rounds and place them on some parchment on a cookie sheet.
Now you can get fancy. I put chopped almonds on some and vanilla sugar on the rest.
20 minutes in the oven...
They kind of melted into each other. I'll work on that, but they're super crisp and very tasty. So, get baking!
Thursday, March 31, 2011
No need to Waffle about these things. Go right ahead and eat em.
Yes, it's been a while since I did some food blogging, but things have been pretty busy in the news and political blogging world. I've managed to get on average two posts up at Big Journalism a week as well as one up on News Real Blog. I have a few more real Jewish food recipes waiting to get written up, but I thought I'd digress and toss in a quick Gluten Free breakfast treat for all you folks who are unable to partake in wheat and associated grains. So, get your irons ready and get your waffle on!
You'll Need:
You'll Need:
1 1/4 cups rice flour (either brown or white)
1/4 cup corn flour
1/2 cup potato starch
1/4 cup tapioca flour
2 teaspoons baking powder
1 teaspoon salt
1/4 cup oil
2 eggs (separated)
1 1/2 cups buttermilk (I used soy buttermilk which is 1 3/8 cups soy milk + 2 tbsps vinegar)
2 tablespoons sugar
1/4 cup corn flour
1/2 cup potato starch
1/4 cup tapioca flour
2 teaspoons baking powder
1 teaspoon salt
1/4 cup oil
2 eggs (separated)
1 1/2 cups buttermilk (I used soy buttermilk which is 1 3/8 cups soy milk + 2 tbsps vinegar)
2 tablespoons sugar
Start heating your waffle iron and put the oven on at 200F (95C)
Mix up your flours, baking powder and salt. I had some help for this step.
If you are able to use milk, measure it out. If you want to do it with soy milk then you'll need to curdle it with vinegar. Mix the soy milk and vinegar and stir. Let it sit for 5 or so minutes.
Next up we'll do the eggs. Separate the whites and yolks. The yolks go in with the milk, the whites should be kept on the side.
Add the oil to the milk and egg yolk and mix it up. Then add to the dry ingredients.
Now for the real trick to light crispy waffle. Take your egg whites and beat them to a soft peak.
Add the sugar one tablespoon at a time while beating it. When it's done we're going to fold it into the rest of the batter one scoop at a time. Make sure to get those creases sharp!The resulting batter should be, for lack of a better word, fluffy. Think Hello Kitty. And now into the waffle iron. Every waffle iron is different, so if you're not used to your give yourself a mulligan the first time out. It should come off light and crispy.
In any event, when it's ready put it into the warm oven directly on the rack. This will crisp it up a bit more and keep them warm so you can serve all your waffles as a big batch. Add Syrup or honey to taste. Sit around with friends and family and let them adore you.
Enjoy!
Joo Food
In any event, when it's ready put it into the warm oven directly on the rack. This will crisp it up a bit more and keep them warm so you can serve all your waffles as a big batch. Add Syrup or honey to taste. Sit around with friends and family and let them adore you.
Enjoy!
Joo Food
Sunday, March 6, 2011
Let them Eat Gluten Free Cake!
Taking a short break from the serious Joo Food, I took another stab at the Gluten Free goodness. My wife and daughters took a class in cake decoration last week so I figured we'd make a treat for Shabbos. This is a classic yellow cake, but totally gluten free. It came out spectacularly. I also added a little twist along the way. Something I've been meaning to try for a while is a substitute for whipped cream. I need to make a lot of recipes without dairy ingredients so we can eat them with meat meals, that's just kosher. Most of the time we use non-dairy whipping cream, but it's a bit fake tasting at times. So a while back I found a recipe for making natural vegan whipped cream using coconut milk and wow did it come out well. My eldest daughter then made butter cream icing and fondant to decorate the cake. This will go down as a classic success around here. I'm not going to go into the icing and decorations this time, just improvise.
Stuff you'll need:
The Cake
1 cup tapioca flour
3/4 cup white rice flour
3/4 cup potato flour (or rice flour, I was just out of it)
1 teaspoon salt
3 tsp baking powder
1 tsp baking soda
1 1/2 tsp Guar Gum (or 1 tsp Xanthan Gum)
4 eggs
1 1/2 cups sugar
2/3 cup mayonaisse
1 cup soy milk (regular milk or almond milk also work)
2 tsp vanilla extract
Set the oven to 350F (175C) and get out your mixing bowls.
Sift together the flours.
Followed by the mayo. Which I thought was wacky, but it makes the whole thing pretty creamy. I'm assuming it replaces the butter/margarine.
And that goes together with the sugar.
Apply the hand mixer to the three of 'em until it's all nice and fluffy.
Incorporate into the dry mixture and add the milk.
Then drop in the vanilla.
Mix it until smooooooth.
Now, to prep the cake tin. Smear it with a thin layer of shortening, margarine or butter, or even oil will work and then add a handful of rice flour to coat, so the cake doesn't stick.
Into the oven. Now, here's the tricky bit. It took about an hour to bake all the way through here. But check it with a toothpick after about 30 minutes and again at 45.
When the toothpick comes away clean and the cake is springy to the touch you can remove it from the oven to cool.
Meanwhile...
On to the cream filling. As I said, I've been wanting to try this for a while.
You'll need:
1 Can of Coconut liquid, left on a shelf for at least a week so it separates.
1/4 cup of sugar
When you're ready for this move the can around slowly and gently as you don't want the liquid and the butter to mix. Slowly turn the can over and open it up, drain out the clear liquid, but save it, since you'll need a couple tablespoons.
What's left is a thick white semi solid goop, for lack of a better term.
Start beating this with your mixer and add in a couple spoons of the clear liquid just to help give it some body. Beat until stiff, slowly adding in the sugar as you go. It should form soft peaks when it's ready, having the consistency of, well, whipped cream.
Let's get these bad boys together. For that you'll need to cut the cake in half. If you have kids and you're able to co-opt some blocks they're excellent, otherwise you'll need to find something to rest your knife on to make sure the cut is straight. A long serrated knife is best for this kind of work as well, turning the cake around slowly, cut it through the middle.
Then apply the cream to the bottom half.
Then put the top back on. Apply icing as desired.
Thanks to my eldest daughter, who made the icing and decorated the cake.
And thanks to the family for eating it.
That's all that remained after lunch. And everyone in the family was able to partake!
Stuff you'll need:
The Cake
1 cup tapioca flour
3/4 cup white rice flour
3/4 cup potato flour (or rice flour, I was just out of it)
1 teaspoon salt
3 tsp baking powder
1 tsp baking soda
1 1/2 tsp Guar Gum (or 1 tsp Xanthan Gum)
4 eggs
1 1/2 cups sugar
2/3 cup mayonaisse
1 cup soy milk (regular milk or almond milk also work)
2 tsp vanilla extract
Set the oven to 350F (175C) and get out your mixing bowls.
Sift together the flours.
Then the baking powder, soda and salt.
And finally the Guar Gum.
Mix it all together and then on to the wet stuff. It's the eggs first.Followed by the mayo. Which I thought was wacky, but it makes the whole thing pretty creamy. I'm assuming it replaces the butter/margarine.
And that goes together with the sugar.
Apply the hand mixer to the three of 'em until it's all nice and fluffy.
Incorporate into the dry mixture and add the milk.
Then drop in the vanilla.
Mix it until smooooooth.
Now, to prep the cake tin. Smear it with a thin layer of shortening, margarine or butter, or even oil will work and then add a handful of rice flour to coat, so the cake doesn't stick.
Into the oven. Now, here's the tricky bit. It took about an hour to bake all the way through here. But check it with a toothpick after about 30 minutes and again at 45.
When the toothpick comes away clean and the cake is springy to the touch you can remove it from the oven to cool.
Meanwhile...
On to the cream filling. As I said, I've been wanting to try this for a while.
You'll need:
1 Can of Coconut liquid, left on a shelf for at least a week so it separates.
1/4 cup of sugar
When you're ready for this move the can around slowly and gently as you don't want the liquid and the butter to mix. Slowly turn the can over and open it up, drain out the clear liquid, but save it, since you'll need a couple tablespoons.
What's left is a thick white semi solid goop, for lack of a better term.
Start beating this with your mixer and add in a couple spoons of the clear liquid just to help give it some body. Beat until stiff, slowly adding in the sugar as you go. It should form soft peaks when it's ready, having the consistency of, well, whipped cream.
Let's get these bad boys together. For that you'll need to cut the cake in half. If you have kids and you're able to co-opt some blocks they're excellent, otherwise you'll need to find something to rest your knife on to make sure the cut is straight. A long serrated knife is best for this kind of work as well, turning the cake around slowly, cut it through the middle.
Then apply the cream to the bottom half.
Then put the top back on. Apply icing as desired.
Thanks to my eldest daughter, who made the icing and decorated the cake.
And thanks to the family for eating it.
That's all that remained after lunch. And everyone in the family was able to partake!
Subscribe to:
Posts (Atom)